My new domain is alittlepeaceofhome.com and I would love for you to take a couple minutes to come check out my latest content there. Thank you for your interest!
Saturday, May 28, 2016
Last Post Here, Come Find Me
Blogging here over the last few years has been a great learning experience. Since this was my first experience with really attempting any sort of blog, I would say that it definitely could have gone worse. However, I think I'm ready to run with the big boys now and get my own domain. Hopefully loads of followers and page views will follow, but we shall see.

Saturday, January 9, 2016
Happy New Year!
Happy New Year!! I am undoubtedly behind on my previous resolution, and I won't try to make excuses about that. Mostly, I've been busy and haven't been making the time to document what I've done here. I am still working on finding time to get caught up on sharing all the things I did in 2015, although I was nowhere near reaching my goal of 12 new crafts, 12 new recipes, 10 new DIY beauty hacks, and reading 6 books. I did however, take a handful of weekend trips, so at least that got accomplished! This year I'm keeping it very simple: blog more and keep trying new things.
In the coming weeks I will continue slowly catching up on all the posts that I want to share. I will also continue trying new things (most of them will surely be from things that I've saved on Pinterest). Although we're only 9 days into the new year, I get the feeling that it will be a life changing one for me. No major plans are on the books yet, but a lot can happen in the next 356 days and I can't wait to embrace all that comes my way!
In the coming weeks I will continue slowly catching up on all the posts that I want to share. I will also continue trying new things (most of them will surely be from things that I've saved on Pinterest). Although we're only 9 days into the new year, I get the feeling that it will be a life changing one for me. No major plans are on the books yet, but a lot can happen in the next 356 days and I can't wait to embrace all that comes my way!
Friday, December 25, 2015
Graduation Shadow Box

After taking the time to decorate my cap for graduation, I wasn't about to toss it in the back of my closet until I had something better to do with it. I came up with something better right away! I decided the best thing for me to do is to put it in a shadow box with my cords so that I can display it with my diploma. Here's how I did it:
Supplies:
Shadow box (I used a 12"x12" box that I got from Hobby Lobby. If you use the 40% off coupon that they have each week, it become really affordable! You could also get a bigger one if you wanted to fold up your gown and include in the box as a background.)
Graduation garb
Small pins
Directions:
There isn't much to this project aside from arranging the items and pinning them down to the backing well enough for them to stay put when you hang it up.
Tips:
- It's probably best to place the biggest items where you want them first. Smaller items are easier to squeeze in somewhere.
- If you aren't happy with your first (or second, or third) placement of all your items, don't be afraid to take everything off and start all over.
- Don't pin anything down until you're happy with the entire placement. It could end up being more work in the long run if you have to keep unpinning things.
- Remember that it's okay for some things to stick out a bit. The whole point of a shadow box is to display something that isn't flat!
If you have any other tips, suggestions, or questions, don't hesitate to use the comments section to express them! Good luck fellow crafters!
Monday, November 9, 2015
Rice and Black Bean Stuffed Peppers
Here's another new recipe that I tried as a part of my resolution to try 12 new recipes. I am definitely slacking on this resolution, but hey, I still have 2 months left in the year, so I'm not worried! (Apparently, graduating has no bearing on past procrastination habits :) )
So, before I share this recipe, I have a small side note. I found a recipe for stuffed peppers on Pinterest (of course!), and I modified it some, but not entirely. That being said, after eating the stuffed peppers, I decided that I needed to make a few more minor changes, so the recipe I'm sharing is the one I will be using next time. Now, without further adieu, check out this tasty vegetarian dish:
Ingredients:
4 green bell peppers, tops cut off and insides hollowed out
2 cups cooked brown rice
1 can black beans
1 large onion, diced
2 cloves minced garlice
2 tsp. vegetable oil
1/2 tsp. oregano
1/4 grated mozzarella cheese
Directions:
1. Preheat oven to 375. Meanwhile, saute garlic and onion in a large pan until onion is translucent. Next add cooked rice and black beans. Cook until heated through.
2. Set bell peppers into a baking dish. Fill each bell pepper with rice and bean mixture. Bake for 30 minutes or so. Pull the peppers out, top with mozzarella cheese, and bake for another 10-15 minutes, until cheese is melted and slightly golden brown.
3. Serve warm and refrigerate leftovers.
That's it! It was easy and tasty. I can hardly wait to try this new version! Share your favorite stuffed peppers recipe in the comments; I would love to give it a try!


So, before I share this recipe, I have a small side note. I found a recipe for stuffed peppers on Pinterest (of course!), and I modified it some, but not entirely. That being said, after eating the stuffed peppers, I decided that I needed to make a few more minor changes, so the recipe I'm sharing is the one I will be using next time. Now, without further adieu, check out this tasty vegetarian dish:
Ingredients:
4 green bell peppers, tops cut off and insides hollowed out
2 cups cooked brown rice
1 can black beans
1 large onion, diced
2 cloves minced garlice
2 tsp. vegetable oil
1/2 tsp. oregano
1/4 grated mozzarella cheese
Directions:
1. Preheat oven to 375. Meanwhile, saute garlic and onion in a large pan until onion is translucent. Next add cooked rice and black beans. Cook until heated through.
2. Set bell peppers into a baking dish. Fill each bell pepper with rice and bean mixture. Bake for 30 minutes or so. Pull the peppers out, top with mozzarella cheese, and bake for another 10-15 minutes, until cheese is melted and slightly golden brown.
3. Serve warm and refrigerate leftovers.
That's it! It was easy and tasty. I can hardly wait to try this new version! Share your favorite stuffed peppers recipe in the comments; I would love to give it a try!


Saturday, September 12, 2015
Small Smashed Potatoes
First off, I am completely aware of how long it has been since my last post, but to be fair, post-graduation life has held a lot of new adventures that have been taking up most of my time. Secondly, I have been keeping up with my resolutions, continuing to try new things, I just haven't made the time to share them here. That being said, here is the start of my effort to get all caught up!
Small Smashed Potatoes:
Ingredients:
Small Smashed Potatoes:
Ingredients:
- 3-4 small potatoes per person (I used both red and yellow potatoes)
- 1 tablespoon olive oil per person
- salt & pepper
Directions:
1. Place the potatoes in a pot of water and boil them until they are tender. This should take about 20 minutes, depending on how many potatoes you are cooking. When they are finished cooking, drain the water and let them cool for a few minutes, so they are not too hot to handle.
2. Preheat oven to 450 degrees. Pat the potatoes dry and smash each one with something flat, like a small plate or the bottom of a measuring cup. Put smashed potatoes onto a baking sheet.
3. Drizzle the olive oil over the potatoes and season with salt and pepper, making sure that the potatoes are evenly coated.
4. Cook the potatoes in the oven for about 15 minutes. Take them out, flip them over, and cook them for an additional 10-15 minutes. Serve the potatoes warm, and store the leftovers in the fridge.
These potatoes come out crispy and delicious! To give this recipe some more flavor, try using garlic salt or garnishing them with chopped parsley.


Monday, May 18, 2015
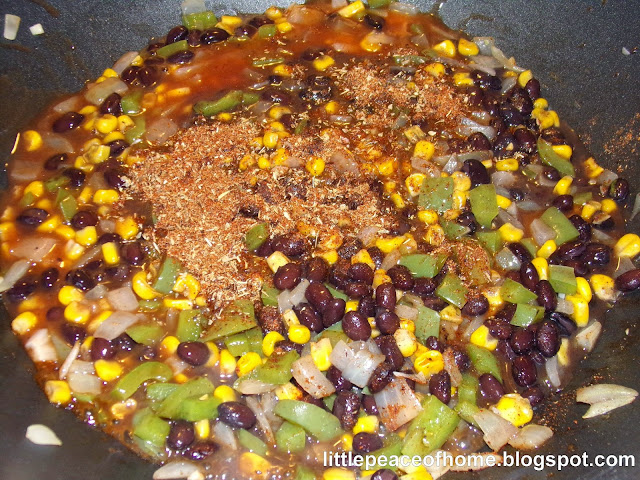
Cheesy Enchilada Rice Skillet
Here is the first of 12 new recipes that I have decided to try this year! I got the original recipe from here, but I made some adjustments for my own benefit, so they aren't exactly the same.
Cheesy Enchilada Rice Skillet
Ingredients:
2 cups uncooked brown rice
1.5 tablespoons olive oil
4 cloves garlic, minced
1 small onion, chopped
1 bell pepper, chopped
2 cups frozen corn
1 can black beans, rinsed and drained
1 can enchilada sauce
1 teaspoon chili powder
1/2 teaspoon cumin
1/2 teaspoon oregano
1-2 cups shredded Mexican cheese blend
Directions:
1. Cook rice according to package instructions and set aside.
2. Heat olive oil in large skillet and add garlic, onion, bell pepper, and corn. Cook until onions are translucent.
3. Add in black beans, enchilada sauce, chili powder, cumin and oregano, and stir until well combined. Add in cooked rice and stir.
4. Top with cheese and wait a few minutes until the cheese is melted.
5. Serve warm with tortillas.
Tell me what you think about this recipe in the comments! I sure enjoyed it :)



Cheesy Enchilada Rice Skillet
Ingredients:
2 cups uncooked brown rice
1.5 tablespoons olive oil
4 cloves garlic, minced
1 small onion, chopped
1 bell pepper, chopped
2 cups frozen corn
1 can black beans, rinsed and drained
1 can enchilada sauce
1 teaspoon chili powder
1/2 teaspoon cumin
1/2 teaspoon oregano
1-2 cups shredded Mexican cheese blend
Directions:
1. Cook rice according to package instructions and set aside.
2. Heat olive oil in large skillet and add garlic, onion, bell pepper, and corn. Cook until onions are translucent.
3. Add in black beans, enchilada sauce, chili powder, cumin and oregano, and stir until well combined. Add in cooked rice and stir.
4. Top with cheese and wait a few minutes until the cheese is melted.
5. Serve warm with tortillas.
Tell me what you think about this recipe in the comments! I sure enjoyed it :)


Tuesday, March 10, 2015
Buttoned Letter
One of the best things you can do with a bunch of random buttons is use them to decorate your home. Check it out:
This is another incredibly easy project.
Supplies:
Wooden Letter (I bet you'll be shocked to hear that I got mine from Hobby Lobby ;) )
Paint (I chose to use a pearly white)
Buttons (I chose to go with a white, pink, and brown color scheme)
Hot glue gun
1. Paint your letter and let it dry. Keep in mind that it may need a second coat.
2. While your paint is drying, gather some buttons that will go well together. Don't worry about making sure that they all match perfectly well. Having a sort of "statement piece" button is part of the creativity!
3. Glue your buttons onto your letter. Try to arrange them in a way that covers most of letter but doesn't crowd it. It's a good idea to play with different arrangements before you actually start gluing things down.
4. Find a place for it and display it. You can hang it up on a wall or cabinet or buy a simple plate display stand to display it on a shelf or mantel.

Easy Canvas Wall Art
This is one of the easiest art projects I think I've ever completed, so don't hesitate to give it a shot!
Supplies:
canvas (you can get a two-pack for pretty cheap at Hobby Lobby)
paint
decorative paper (1 to 4 different kinds, I used 3 that came together in a pack of scrap-booking paper so that they went well together)
hot glue
fancy button.
Directions:
1. Paint your entire canvas and let it dry completely. It may need two coats, depending on the color you choose and the paint brand you use.
2. Hot glue your button anywhere on the canvas, but it doesn't necessarily have to be smack in the middle.
3. Cut your paper into ovals with pointed ends. I can't think of another way to describe it, but you can reference the picture if you aren't sure what I mean. You'll want some smaller ovals and some larger ovals.
4. Hot glue the small ovals near the button, pointing outward like a flower. As you progress further away from the button, start incorporating your big ovals. As you approach the edges of the canvas, just wrap the paper around the sides and glue it to the back. This looks better than trimming it at the edge.
5. Wait for all the glue to cool off and hang it up!


Supplies:
canvas (you can get a two-pack for pretty cheap at Hobby Lobby)
paint
decorative paper (1 to 4 different kinds, I used 3 that came together in a pack of scrap-booking paper so that they went well together)
hot glue
fancy button.
Directions:
1. Paint your entire canvas and let it dry completely. It may need two coats, depending on the color you choose and the paint brand you use.
2. Hot glue your button anywhere on the canvas, but it doesn't necessarily have to be smack in the middle.
3. Cut your paper into ovals with pointed ends. I can't think of another way to describe it, but you can reference the picture if you aren't sure what I mean. You'll want some smaller ovals and some larger ovals.
4. Hot glue the small ovals near the button, pointing outward like a flower. As you progress further away from the button, start incorporating your big ovals. As you approach the edges of the canvas, just wrap the paper around the sides and glue it to the back. This looks better than trimming it at the edge.
5. Wait for all the glue to cool off and hang it up!
Rustic Necklace Holder DIY
It has been far to long since I've last posted something, at least for my liking. College sure does have a way of making life crazy, but it's spring break and I'm taking advantage of the free time! I'm actually going to be blogging about three projects that I completed a couple years ago, but they are still way cute and worth sharing! The first one is a necklace holder:
Supplies:
flat piece of wood (the older it looks, the better, just make sure it's sturdy enough)
5 knobs (you can use more or less, depending on your piece of wood and your preference, I bought mine from Hobby Lobby)
about 3 feet of chain
2 small nails
I don't have pictures of each step because I did it so long ago, but I'll be as descriptive as possible and you can refer to the picture of the final product.
1. Drill holes in your piece of wood, one for each knob you have. You may want to measure the distance between them to make sure it's equal, but that's not absolutely necessary.
2. Screw your knobs into the wood where you drilled the holes. It's very likely that they will stick out in the back. I had my brother use his angle grinder to get rid of the excess screw on the knobs.
3. Decide where you want the chain to attach to the wood and nail your nails into those two spots. Attach you chain and hang it up! It's that easy! And so cute :)


Supplies:
flat piece of wood (the older it looks, the better, just make sure it's sturdy enough)
5 knobs (you can use more or less, depending on your piece of wood and your preference, I bought mine from Hobby Lobby)
about 3 feet of chain
2 small nails
I don't have pictures of each step because I did it so long ago, but I'll be as descriptive as possible and you can refer to the picture of the final product.
1. Drill holes in your piece of wood, one for each knob you have. You may want to measure the distance between them to make sure it's equal, but that's not absolutely necessary.
2. Screw your knobs into the wood where you drilled the holes. It's very likely that they will stick out in the back. I had my brother use his angle grinder to get rid of the excess screw on the knobs.
3. Decide where you want the chain to attach to the wood and nail your nails into those two spots. Attach you chain and hang it up! It's that easy! And so cute :)
Saturday, January 10, 2015
101 Ways to be Less Wasteful This Year
I learned somewhere that the average American produces 4.5 pounds of trash every day. Four and a half pounds every day! To me, this was astonishing and disgusting, but there's no denying that we live in a wasteful society, and not just in the realm of garbage. It seems like we've become wasteful in a variety of ways, so here's my small contribution in an attempt to change this surprising statistic: I am going to make a list of ways that we can each be less wasteful in our own lives, organized by category, and then do my best to implement them myself.

Water:
1. Turn off the water when you brush your teeth.
2. Shave every other shower, rather than every shower. Better yet, fill the sink up with water and rinse your razor that way. Sure it might not be as convenient, but it definitely saves water!
3. Fix any leaky faucets, inside and outside.
4. When emptying out a pet's water bowl or a water bottle that's been rolling around in the backseat of your car for the last 2 weeks, pour it on a plant.
5. Reuse your towels and wear your jeans twice before washing them.
6. Only wash full loads of laundry.
7. Don't run the dishwasher until it's full.
8. Use your toilet for flushing waste only. Sending cigarette butts and tissues down the toilet wastes water unnecessarily.
9. Take shorter showers.
10. When washing dishes by hand, fill up a sink with soapy water and a sink with water for rinsing, rather than letting the water run while you wash and rinse.
11. Adjust your sprinklers to make sure you are watering nothing more than plants. The side walk and your front porch can easily become wasteful targets of your sprinklers.
12. Water your lawn in the mornings, so that less water is evaporated by the heat of the mid-day sun.
13. Don't let the hose run when washing your car.
14. Clean driveways and sidewalks with a broom instead of a hose.
Electricity:
15. Be intentional about turning off lights that you aren't using.
16. Open windows during the day, rather than turning lights on
17. Unplug appliances and chargers that you aren't using (like the toaster/coffee maker/phone chargers).
18. Buy energy-efficient light bulbs next time you need to replace one.
19. Hang your clothes to dry, rather than tossing them in the dryer. This could also help your clothes last longer.
20. If you must use a dryer, toss a dry towel in with your wet loads of launday. It's supposed to cut back on the drying time.
21. Switch out your plug-in air fresheners for candles or a spray air freshener.
22. Use fans when it starts to warm up in order to put off turning on the air conditioner.
23. When its cold, put on a sweater and some warm socks instead of turning the heater up.
24. Let your left-overs cool off before sticking them in the fridge. This way, the fridge doesn't have to work as hard to cool them off.
25. Keep your fridge full so that it runs more efficiently.
26. When it's hot, consider making meals in a crockpot or on the stove top, rather than in the oven, to avoid heating up the entire house.
27. Let your computer hibernate when you aren't using it, as opposed to having it switch to a screen saver.
Gasoline:
28. Drive with the windows down instead of using air conditioning for in town driving. For higher speeds, using the air conditioner is actually more fuel efficient because it does not mess with the aerodynamics the way rolled-down windows do.
29. Use sun-reflectors when you park to reduce the need for cranking the air conditioning up when you get back in.
30. Accelerate slowly.
31. Don't brake abruptly.
32. Drive between 1500 and 2500 rpms by shifting up when the rpms get out of this range.
33. Take the highway when you can. Driving about 55 mph is supposed to be the best speed for getting ideal gas mileage.
34. Keep tires inflated to the right amount.
35. Don't let your car sit in idle. Try parking and walking inside as often as you can.
36. Clean out the junk that you're hauling around. Driving with more weight in the car means using more gas.
37.Change your oil regularly and make sure to take of other routine maintenance to keep your engine running smoothly and efficiently.
38. Combine your errands and plan out the shortest route to get to all the places on your list.
39. Make sure your radio and fan are off before turning off your car. Leaving these things on puputs extra strain on the engine when you start it back up again.
40. Carpool with people from work.
41. Take the bus or ride a bike whenever possible.
Paper:
42. Recycle your shredded paper.
43. Use the front and back of every sheet of paper. One piece of paper just turned into two grocery lists or two scoring notepads for a game.
44. Switch to online billing and online bank statements.
45. Opt for no receipt or an emailed receipt whenever possible.
46. Instead of using paper towels, use a sponge or a wash cloth to wipe things down and a rag or old towel to clean up messes.
47. Use the backs of old receipts to make shopping lists or to-do lists.
48. Print documents double-sided whenever possible.
49. When you can, use smaller font size and smaller margins to fit more on each printed document.
50. Keep paper plate usage to a minimum.
51. When you have the option, buy recycled paper products.
52. Invest in a white board for leaving notes, keeping score in games, and writing reminders.
53. When given the option, use a hand dryer instead of paper towels. If paper towels are your only option, shake your hands 12 times and you will only need 1 small paper towel to dry them the rest of the way.
54. If you can manage, opt for a digital planner/calendar as opposed to a paper one.
55. Only print things that are absolutely necessary.
56. Use thinner paper.
Plastic:
57. Invest in a reusable water bottle, rather than buying cases of bottled water.
58. Use plastic grocery bags to line the small waste baskets in your home.
59. Buy fresh produce, rather than the kind in plastic cups.
60. Use razors with replaceable blades as opposed to disposable razors.
61. Skip on the straw when you go out to eat.
62. Reuse zip-lock bags by washing them out after each use.
63. When it comes time to replace your left-over containers, buy glass instead of plastic.
64. Store your kitchen staples (like flour, sugar, pasta, beans, etc.) in glass containers rather than plastic ones.
65. Invest in cloth bags and take them grocery shopping with you. This also reduces the number of bags you have to haul in, because each cloth bag can hold more than a plastic bag.
66. Buy toys that are made out of wood or other non-plastic materials.
67. Refuse to buy plastic forks, knives, and spoons for everyday use.
68. Start composting so that your plastic trash bags don't fill up as quickly.
69. Use empty pet-food bags for trash-collecting, rather than throwing them away when they are empty.
70. Visit your local farmer's market and buy food that comes in less packaging.
71. Skip on the plastic shower curtains and shower curtain liners.
72. Use a natural loofah sponge rather than the plastic scrubbies that so many of use.
Food:
73. Plan out your meals carefully so you know exactly how much food you need.
74. Buy produce weekly at most. Buying less often (like every other week) runs you the risk of having rotten fruits and veggies because you are stocking up with more than you can eat.
75. Freeze the foods that are getting ready to expire. This works for meats, breads, milk, most fruits and veggies, left-overs, etc.
76. Take smaller portions to start and go back for seconds if you need to, to avoid throwing food away.
77. Don't dread eating left-overs. Look at left-overs as an easy meal that you didn't have to cook. Better yet, transform them into another dish. Add leftover grilled chicken to a salad or turn leftover beans and rice into a tasty burrito.
78. Plan meals based on what you already have on hand that needs using up.
79. Be sure to rotate your food so that you are eating the oldest stuff first.
80. Make a list of all the food you throw out each week to find patterns. If you never finish a whole gallon of milk, freeze half of it the day you bring it home or start buying smaller containers.
81. Store dry goods in air-tight containers to avoid getting that stale taste.
82. Check the expiration dates on food products before buying them.
83. Use expiration dates as a guide. If food still looks, smells, and tastes okay, it's more than likely just fine for you to eat.
84. Make new meals that you're unsure of when company is around to help you finish it if you don't end up liking it.
85. Be sure that you are storing your food properly, especially when it comes to fruits and veggies.
86. Check your fridge before going grocery shopping to avoid buying something you already have.
87. Keep food that needs to be eaten up in plain sight so you don't forget about it.
88. Keep your grocery list realistic and avoid excessive impulse buying when you are hungry.
Time:
89. Create a 'time-budget' by not allowing yourself to spend too much time on certain things.
90. Make a to-do list or a shopping list while you wait, whether it be in line at the pharmacy or sitting on the bus.
91. Be realistic about what you plan to accomplish during a single day in order to stay motivated and avoid frustration or disappointment.
92. Do all you can to keep yourself healthy! No one likes wasting time by being sick.
93. Take 5 minutes each morning to decide what you want to have done by the time you go to bed and write it down to keep yourself accountable.
94. Cut out distractions (like your phone, Facebook, and chatty people)when you're on a mission to get something done.
95. Use a planner to keep yourself organized and to avoid spreading yourself too thin
96. Clean things a little here and there when you have 20 minutes, rather than waiting for the end of the week to do everything at once for a couple hours.
97. Prioritize your to-do list.
98. Take breaks to avoid becoming burnt-out and unproductive.
99. At the beginning of the week, delegate a certain block of time each week to doing the things you know need to get done, like grocery shopping and laundry. To make it even easier on yourself, pick a day and time and make it weekly routine to shop or do laundry during that time on that day.
100. Never go to the grocery store more than once a week. It may take a couple weeks to get the hang of being organized enough to not forget anything, but it will save you lots of time in the end.
101. Learn how to say no. As much as you love your friends and family, you can't do every favor they ask of you, and as stressful as work or school may be, make sure it is not taking over your life without your conscience consent.
This feels like a pretty comprehensive list of ideas, but they seem easy enough for anyone to get started with. There are many more ideas about these sorts of things all over the internet, and in fact I used many other websites to help me compile all these ideas! Tell me how you plan on being less wasteful in the comments section!
Water:
1. Turn off the water when you brush your teeth.
2. Shave every other shower, rather than every shower. Better yet, fill the sink up with water and rinse your razor that way. Sure it might not be as convenient, but it definitely saves water!
3. Fix any leaky faucets, inside and outside.
4. When emptying out a pet's water bowl or a water bottle that's been rolling around in the backseat of your car for the last 2 weeks, pour it on a plant.
5. Reuse your towels and wear your jeans twice before washing them.
6. Only wash full loads of laundry.
7. Don't run the dishwasher until it's full.
8. Use your toilet for flushing waste only. Sending cigarette butts and tissues down the toilet wastes water unnecessarily.
9. Take shorter showers.
10. When washing dishes by hand, fill up a sink with soapy water and a sink with water for rinsing, rather than letting the water run while you wash and rinse.
11. Adjust your sprinklers to make sure you are watering nothing more than plants. The side walk and your front porch can easily become wasteful targets of your sprinklers.
12. Water your lawn in the mornings, so that less water is evaporated by the heat of the mid-day sun.
13. Don't let the hose run when washing your car.
14. Clean driveways and sidewalks with a broom instead of a hose.
Electricity:
15. Be intentional about turning off lights that you aren't using.
16. Open windows during the day, rather than turning lights on
17. Unplug appliances and chargers that you aren't using (like the toaster/coffee maker/phone chargers).
18. Buy energy-efficient light bulbs next time you need to replace one.
19. Hang your clothes to dry, rather than tossing them in the dryer. This could also help your clothes last longer.
20. If you must use a dryer, toss a dry towel in with your wet loads of launday. It's supposed to cut back on the drying time.
21. Switch out your plug-in air fresheners for candles or a spray air freshener.
22. Use fans when it starts to warm up in order to put off turning on the air conditioner.
23. When its cold, put on a sweater and some warm socks instead of turning the heater up.
24. Let your left-overs cool off before sticking them in the fridge. This way, the fridge doesn't have to work as hard to cool them off.
25. Keep your fridge full so that it runs more efficiently.
26. When it's hot, consider making meals in a crockpot or on the stove top, rather than in the oven, to avoid heating up the entire house.
27. Let your computer hibernate when you aren't using it, as opposed to having it switch to a screen saver.
Gasoline:
28. Drive with the windows down instead of using air conditioning for in town driving. For higher speeds, using the air conditioner is actually more fuel efficient because it does not mess with the aerodynamics the way rolled-down windows do.
29. Use sun-reflectors when you park to reduce the need for cranking the air conditioning up when you get back in.
30. Accelerate slowly.
31. Don't brake abruptly.
32. Drive between 1500 and 2500 rpms by shifting up when the rpms get out of this range.
33. Take the highway when you can. Driving about 55 mph is supposed to be the best speed for getting ideal gas mileage.
34. Keep tires inflated to the right amount.
35. Don't let your car sit in idle. Try parking and walking inside as often as you can.
36. Clean out the junk that you're hauling around. Driving with more weight in the car means using more gas.
37.Change your oil regularly and make sure to take of other routine maintenance to keep your engine running smoothly and efficiently.
38. Combine your errands and plan out the shortest route to get to all the places on your list.
39. Make sure your radio and fan are off before turning off your car. Leaving these things on puputs extra strain on the engine when you start it back up again.
40. Carpool with people from work.
41. Take the bus or ride a bike whenever possible.
Paper:
42. Recycle your shredded paper.
43. Use the front and back of every sheet of paper. One piece of paper just turned into two grocery lists or two scoring notepads for a game.
44. Switch to online billing and online bank statements.
45. Opt for no receipt or an emailed receipt whenever possible.
46. Instead of using paper towels, use a sponge or a wash cloth to wipe things down and a rag or old towel to clean up messes.
47. Use the backs of old receipts to make shopping lists or to-do lists.
48. Print documents double-sided whenever possible.
49. When you can, use smaller font size and smaller margins to fit more on each printed document.
50. Keep paper plate usage to a minimum.
51. When you have the option, buy recycled paper products.
52. Invest in a white board for leaving notes, keeping score in games, and writing reminders.
53. When given the option, use a hand dryer instead of paper towels. If paper towels are your only option, shake your hands 12 times and you will only need 1 small paper towel to dry them the rest of the way.
54. If you can manage, opt for a digital planner/calendar as opposed to a paper one.
55. Only print things that are absolutely necessary.
56. Use thinner paper.
Plastic:
57. Invest in a reusable water bottle, rather than buying cases of bottled water.
58. Use plastic grocery bags to line the small waste baskets in your home.
59. Buy fresh produce, rather than the kind in plastic cups.
60. Use razors with replaceable blades as opposed to disposable razors.
61. Skip on the straw when you go out to eat.
62. Reuse zip-lock bags by washing them out after each use.
63. When it comes time to replace your left-over containers, buy glass instead of plastic.
64. Store your kitchen staples (like flour, sugar, pasta, beans, etc.) in glass containers rather than plastic ones.
65. Invest in cloth bags and take them grocery shopping with you. This also reduces the number of bags you have to haul in, because each cloth bag can hold more than a plastic bag.
66. Buy toys that are made out of wood or other non-plastic materials.
67. Refuse to buy plastic forks, knives, and spoons for everyday use.
68. Start composting so that your plastic trash bags don't fill up as quickly.
69. Use empty pet-food bags for trash-collecting, rather than throwing them away when they are empty.
70. Visit your local farmer's market and buy food that comes in less packaging.
71. Skip on the plastic shower curtains and shower curtain liners.
72. Use a natural loofah sponge rather than the plastic scrubbies that so many of use.
Food:
73. Plan out your meals carefully so you know exactly how much food you need.
74. Buy produce weekly at most. Buying less often (like every other week) runs you the risk of having rotten fruits and veggies because you are stocking up with more than you can eat.
75. Freeze the foods that are getting ready to expire. This works for meats, breads, milk, most fruits and veggies, left-overs, etc.
76. Take smaller portions to start and go back for seconds if you need to, to avoid throwing food away.
77. Don't dread eating left-overs. Look at left-overs as an easy meal that you didn't have to cook. Better yet, transform them into another dish. Add leftover grilled chicken to a salad or turn leftover beans and rice into a tasty burrito.
78. Plan meals based on what you already have on hand that needs using up.
79. Be sure to rotate your food so that you are eating the oldest stuff first.
80. Make a list of all the food you throw out each week to find patterns. If you never finish a whole gallon of milk, freeze half of it the day you bring it home or start buying smaller containers.
81. Store dry goods in air-tight containers to avoid getting that stale taste.
82. Check the expiration dates on food products before buying them.
83. Use expiration dates as a guide. If food still looks, smells, and tastes okay, it's more than likely just fine for you to eat.
84. Make new meals that you're unsure of when company is around to help you finish it if you don't end up liking it.
85. Be sure that you are storing your food properly, especially when it comes to fruits and veggies.
86. Check your fridge before going grocery shopping to avoid buying something you already have.
87. Keep food that needs to be eaten up in plain sight so you don't forget about it.
88. Keep your grocery list realistic and avoid excessive impulse buying when you are hungry.
Time:
89. Create a 'time-budget' by not allowing yourself to spend too much time on certain things.
90. Make a to-do list or a shopping list while you wait, whether it be in line at the pharmacy or sitting on the bus.
91. Be realistic about what you plan to accomplish during a single day in order to stay motivated and avoid frustration or disappointment.
92. Do all you can to keep yourself healthy! No one likes wasting time by being sick.
93. Take 5 minutes each morning to decide what you want to have done by the time you go to bed and write it down to keep yourself accountable.
94. Cut out distractions (like your phone, Facebook, and chatty people)when you're on a mission to get something done.
95. Use a planner to keep yourself organized and to avoid spreading yourself too thin
96. Clean things a little here and there when you have 20 minutes, rather than waiting for the end of the week to do everything at once for a couple hours.
97. Prioritize your to-do list.
98. Take breaks to avoid becoming burnt-out and unproductive.
99. At the beginning of the week, delegate a certain block of time each week to doing the things you know need to get done, like grocery shopping and laundry. To make it even easier on yourself, pick a day and time and make it weekly routine to shop or do laundry during that time on that day.
100. Never go to the grocery store more than once a week. It may take a couple weeks to get the hang of being organized enough to not forget anything, but it will save you lots of time in the end.
101. Learn how to say no. As much as you love your friends and family, you can't do every favor they ask of you, and as stressful as work or school may be, make sure it is not taking over your life without your conscience consent.
This feels like a pretty comprehensive list of ideas, but they seem easy enough for anyone to get started with. There are many more ideas about these sorts of things all over the internet, and in fact I used many other websites to help me compile all these ideas! Tell me how you plan on being less wasteful in the comments section!
Friday, January 9, 2015
Gathering Blue by Lois Lowry
Gathering Blue was one of those books that had been sitting on my shelf for at least 10 years, that I had great intentions of reading, but never got to. I figured that was enough to make it the perfect book to start with for my New Year's Resolution.
I read the whole thing in about 5 days, but it was a short book that I found intriguing, and I'll admit that it was probably meant for pre-teens, so the language was incredibly easy to get thorough. Nonetheless, I still enjoyed it.
It's a story about a young girl named Kira, who lives in a small village where everyone has a job to do. However, Kira has a twisted leg and is in jeopardy of losing her place in the village when her mother dies and there is no one to defend her life. After a trial though, her life is spared and she is given a job that affords her certain privileges because no one else in the village is capable of doing it. Not too far into the book though, she starts questioning the things that she grew up knowing to be true and begins to discover unsettling truths about the place she calls home.
Even though this book was meant for a younger audience, and I did have some of the major "secrets" figured out pretty early on, it was still an enjoyable book and there were a few turns at the end that I wasn't expecting. This book would be great for anyone who is into futuristic stories with prominent adolescent characters.
1 down, 5 books to go. If you have suggestions for my next one, I would love to hear about them in the comments section!
I read the whole thing in about 5 days, but it was a short book that I found intriguing, and I'll admit that it was probably meant for pre-teens, so the language was incredibly easy to get thorough. Nonetheless, I still enjoyed it.
It's a story about a young girl named Kira, who lives in a small village where everyone has a job to do. However, Kira has a twisted leg and is in jeopardy of losing her place in the village when her mother dies and there is no one to defend her life. After a trial though, her life is spared and she is given a job that affords her certain privileges because no one else in the village is capable of doing it. Not too far into the book though, she starts questioning the things that she grew up knowing to be true and begins to discover unsettling truths about the place she calls home.
Even though this book was meant for a younger audience, and I did have some of the major "secrets" figured out pretty early on, it was still an enjoyable book and there were a few turns at the end that I wasn't expecting. This book would be great for anyone who is into futuristic stories with prominent adolescent characters.
1 down, 5 books to go. If you have suggestions for my next one, I would love to hear about them in the comments section!
Thursday, January 1, 2015
Week 52: New New Year's Resolution
Well, I fell way behind on these blogs and I am one day late in finishing for 2014, but I did in fact experience 52 new things! Maybe even more than that, but I blogged about at least 52 of them. Here is the last one: a brand new New Year's Resolution.
The New:
Instead of trying to do 52 new things this next year, I have decided to be a little bit more specific in the new things I hope to accomplish. Here's what I have in mind:
The evidence and verdict sections of this last "new" post just don't make sense, as I have yet to provide evidence of doing these things or an assessment of how I felt about doing them. However, I will be blogging about them as I work my way through them.
Feel free to share your resolutions in the comments! I would love to hear about them :)
The New:
Instead of trying to do 52 new things this next year, I have decided to be a little bit more specific in the new things I hope to accomplish. Here's what I have in mind:
- make 12 new recipes
- finish 12 crafts
- try 10 new things from my "you look gorgeous" Pinterest board
- read 6 new books
- take 3 weekend trips
The evidence and verdict sections of this last "new" post just don't make sense, as I have yet to provide evidence of doing these things or an assessment of how I felt about doing them. However, I will be blogging about them as I work my way through them.
Feel free to share your resolutions in the comments! I would love to hear about them :)
Week 51: New De-Icing Method
The New:
Since the weather has been so cold, its a regular thing for me to wake up and have ice on my car windows. Even though scraping that ice off is so much fun (not!) I decided to seek out other options and found the recipe for a deicer on Pinterest. This is what I found:
Mix 2 parts rubbing alcohol with 1 part water and spray on windows.
Seems easy enough, right?
The Evidence:


The Verdict:
I finally got the chance to use this de-icing soluton this morning and it worked great! As you can see from the photos above, I will never have scrape ice off my windshield again, and I couldn't be happier about it!
Since the weather has been so cold, its a regular thing for me to wake up and have ice on my car windows. Even though scraping that ice off is so much fun (not!) I decided to seek out other options and found the recipe for a deicer on Pinterest. This is what I found:
Mix 2 parts rubbing alcohol with 1 part water and spray on windows.
Seems easy enough, right?
The Evidence:
The Verdict:
I finally got the chance to use this de-icing soluton this morning and it worked great! As you can see from the photos above, I will never have scrape ice off my windshield again, and I couldn't be happier about it!
Tuesday, December 30, 2014
Week 50: New Book Page Craft
Do you remember when I hollowed out that book to make a secret hiding cubbie? (If not, find the post here.) I'm sure you are wondering what I did with all those pages that I cut out of there (or maybe you aren't), so here's the answer to that burning question!
The New:
I have always been a fan of using mod podge to make things, but I had never done anything quite like this project. For this craft, I bought wooden letters that spell out R-E-A-D and found those old pages that I had been saving for this.
Supplies:
Wooden Letters
Book pages
Scissors
Mod podge
Paint brush
Directions:
1. Cut the book pages into strips that will be easy to work with. The size of your strips will depend on how big your letters are and the sort of effect you want to create.
2. Grab the first letter and begin sticking the strips of paper to it using the mod podge and the paint brush. You may have to make slits in the page strips so that it lays flat against rounded edges (see pictures below).
3. Let them dry completely before hanging.
The Evidence:


You can see in this picture where I made some cuts on the page strips so that they would lay flat on the front.


The Verdict:
This project took much longer than I expected it to, with the total amount of time spent on it adding up to somewhere around 5 or 6 hours. However, it was totally worth it as I am stoked about how awesome it came out! Let me just say, I would not want to do it again with a word that has more than 5 or 6 letters, so keep this in mind when deciding on what word you want to spell out. Aside from the tediousness of it, this craft was super simple and I would bet that even kids could do it (although the edges might not look as crisp).
The New:
I have always been a fan of using mod podge to make things, but I had never done anything quite like this project. For this craft, I bought wooden letters that spell out R-E-A-D and found those old pages that I had been saving for this.
Supplies:
Wooden Letters
Book pages
Scissors
Mod podge
Paint brush
Directions:
1. Cut the book pages into strips that will be easy to work with. The size of your strips will depend on how big your letters are and the sort of effect you want to create.
2. Grab the first letter and begin sticking the strips of paper to it using the mod podge and the paint brush. You may have to make slits in the page strips so that it lays flat against rounded edges (see pictures below).
3. Let them dry completely before hanging.
The Evidence:
You can see in this picture where I made some cuts on the page strips so that they would lay flat on the front.
The Verdict:
This project took much longer than I expected it to, with the total amount of time spent on it adding up to somewhere around 5 or 6 hours. However, it was totally worth it as I am stoked about how awesome it came out! Let me just say, I would not want to do it again with a word that has more than 5 or 6 letters, so keep this in mind when deciding on what word you want to spell out. Aside from the tediousness of it, this craft was super simple and I would bet that even kids could do it (although the edges might not look as crisp).
Week 49: New Perspective on Vacations
The New:
In May, I will be graduating from college with my bachelor's degree in family studies and psychology, and my boyfriend will have obtained his EMT license. I guess that will make us real, no-more-ramen-noodles-for-dinner adults. In recognition and celebration of this, we are taking a huge road trip from southern New Mexico, along the Gulf Coast, down into Florida, through Nashville and back. It is going to be quite the adventure and I am so very excited, however planning must happen first.
Since my mom had always taken care of the behind-the-scenes stuff for our family vacations, I had no idea how much time, energy, and thought went into this process! Lucky for you though, I am going to attempt to lay it out simply for all my fellow first time vacation planners (and those who still can't seem to get it quite right).
What to do when your trip is:
8-12 Months Away:
The Evidence:
Actual pictures of the trip will surely come this summer, but for now you'll have to accept this picture as evidence.

The Verdict:
While I haven't been through this whole process yet, I can definitely say that it was time consuming! However, I think that all the time put in will be well worth it as we travel worry-free through 9 different states this summer. After we get back from that trip, I will be sure to post pictures and all the details of what we did.
If you have any great travel tips or vacation-planning tips, I would love to hear all about them in the comments section!
In May, I will be graduating from college with my bachelor's degree in family studies and psychology, and my boyfriend will have obtained his EMT license. I guess that will make us real, no-more-ramen-noodles-for-dinner adults. In recognition and celebration of this, we are taking a huge road trip from southern New Mexico, along the Gulf Coast, down into Florida, through Nashville and back. It is going to be quite the adventure and I am so very excited, however planning must happen first.
Since my mom had always taken care of the behind-the-scenes stuff for our family vacations, I had no idea how much time, energy, and thought went into this process! Lucky for you though, I am going to attempt to lay it out simply for all my fellow first time vacation planners (and those who still can't seem to get it quite right).
What to do when your trip is:
8-12 Months Away:
- Decide where you are going, how you are getting there, and how many days you will be gone
- Run a very basic budget for things like transportation (plane ticket, gas, rental car, bus pass, parking fees, etc.), food, some place to stay each night, attractions/entertainment, spending money, etc.
5-6 Months Away:
- Choose a specific day to leave and request the time off from work (if it needs to be done this far in advance). When choosing a day to leave, make sure that the rest of your days work with the attractions you want to see. For example, you don't want to be expecting to go to a certain museum on a Monday if that particular museum is closed on Mondays. Also, if you want to see a certain show, be sure that you are in that city when it is happening. This seems like common sense, but it is easy to forget about during the planning process.
- Narrow down your choices on where to stay, pick a place, and make reservations
- Find out what attractions you want to see and how else you want to spend your vacation days
- Make a budget spread sheet and fill in the numbers as you find out the more specific costs of certain things
- Revise plans as needed
1 Month Away:
- Call campsites/hotels to make sure that your reservations are still in place
- Begin making arrangements for a house-sitter, if necessary
- Revise plans as needed
1 Week Away:
- Begin packing clothes and other things that you won't need for the next week. You may consider purchasing travel-size shampoo/toothpaste/etc. to pack, just to be sure you don't forget to pack these things the morning that you leave.
- Figure out a day to go shopping for snacks, crossword puzzles for the road (if anyone ever does these anymore!), and last minute vacation essentials that you realized you need.
- Have the house-sitter come over for a tour and a debriefing about what they need to do
1 Day Away:
- Double-check packing list to be sure you packed everything
- Get a good night's rest
The Evidence:
Actual pictures of the trip will surely come this summer, but for now you'll have to accept this picture as evidence.
The Verdict:
While I haven't been through this whole process yet, I can definitely say that it was time consuming! However, I think that all the time put in will be well worth it as we travel worry-free through 9 different states this summer. After we get back from that trip, I will be sure to post pictures and all the details of what we did.
If you have any great travel tips or vacation-planning tips, I would love to hear all about them in the comments section!
Monday, December 29, 2014
Week 48: New Adult Milkshake
The New:
Since this is the season of minty desserts, I indulged in a peppermint vodka milkshake. Here's how to make this chilly treat:
Ingredients (for 2 servings):
2 cups peppermint ice cream
1 cup milk
2 Tbsp. vodka
Directions:
Place all ingredients into a blender and blend.
Garnish with a candy cane for if desired.
The Evidence:

The Verdict:
This was such a simple treat and it was delicious! Although I tend to prefer warm beverages during these wintry months, I would definitely make this milkshake again. Tell me about some of your favorite holiday drinks in the comments section!
Since this is the season of minty desserts, I indulged in a peppermint vodka milkshake. Here's how to make this chilly treat:
Ingredients (for 2 servings):
2 cups peppermint ice cream
1 cup milk
2 Tbsp. vodka
Directions:
Place all ingredients into a blender and blend.
Garnish with a candy cane for if desired.
The Evidence:
The Verdict:
This was such a simple treat and it was delicious! Although I tend to prefer warm beverages during these wintry months, I would definitely make this milkshake again. Tell me about some of your favorite holiday drinks in the comments section!
Friday, December 26, 2014
Week 47: New Peachy Dessert
About six weeks ago (yes, this is terribly late!), I happened upon some home-grown peaches and needed something to do with them. So this is what I came up with:
The New:
I made brown sugar cinnamon peaches for dessert, and here's how:
Ingredients:
4 large or 8 small peaches
2 tablespoons butter
2 tablespoons brown sugar
1/2 teaspoon cinnamon
Directions:
1. Peel and slice peaches.
2. Melt butter in pan and then add peaches. Cook peaches for about 3 minutes, stirring occasionally. Add cinnamon and brown sugar. Cook another minute or so, until all ingredients are well-combined.
3. Serve on top of ice cream.
The Evidence:


The Verdict:
This is definitely a recipe that I will be keeping nearby during the fall months! These fried peaches were delicious and just the right amount of sweet. Plus, this recipe is super easy and the ingredients are cheap!
The New:
I made brown sugar cinnamon peaches for dessert, and here's how:
Ingredients:
4 large or 8 small peaches
2 tablespoons butter
2 tablespoons brown sugar
1/2 teaspoon cinnamon
Directions:
1. Peel and slice peaches.
2. Melt butter in pan and then add peaches. Cook peaches for about 3 minutes, stirring occasionally. Add cinnamon and brown sugar. Cook another minute or so, until all ingredients are well-combined.
3. Serve on top of ice cream.
The Evidence:
The Verdict:
This is definitely a recipe that I will be keeping nearby during the fall months! These fried peaches were delicious and just the right amount of sweet. Plus, this recipe is super easy and the ingredients are cheap!
Thursday, December 25, 2014
Week 46: New Christmas Tree
The New:
Although I've had these pictures done for quite a while, I am finally getting around to blogging about them.
So here's the deal: I live in a teeny tiny apartment, where my roommate and I struggle to find places to store our groceries some weeks. Needless to say, there was no way we were going to be able to get an actual Christmas tree into our house, so we improvised. Instead of getting a tree, we made on out of tree lights on the wall and hung ornaments on that instead. This is what it looks like:
The Evidence:


The Verdict:
This was obviously not our first choice in holiday timber, but it sure made our living room feel festive without overcrowding our place. Plus, in good company, everything else about this time of year pales in comparison. Merry Christmas!
Although I've had these pictures done for quite a while, I am finally getting around to blogging about them.
So here's the deal: I live in a teeny tiny apartment, where my roommate and I struggle to find places to store our groceries some weeks. Needless to say, there was no way we were going to be able to get an actual Christmas tree into our house, so we improvised. Instead of getting a tree, we made on out of tree lights on the wall and hung ornaments on that instead. This is what it looks like:
The Evidence:
The Verdict:
This was obviously not our first choice in holiday timber, but it sure made our living room feel festive without overcrowding our place. Plus, in good company, everything else about this time of year pales in comparison. Merry Christmas!
Week 45: New Popcicle Stick Craft
Since today is a day of rest, relaxation, and celebration, I figured there was no better day than this one to catch up on some of these blogs. Merry Christmas everyone!
The New:
Popcicle sticks are always a fun thing to craft with, but I had never before thought of making snowflakes with them until I saw a picture on Pinterest. So rather than just doing it myself, I decided to let the kids that I work with have their hand at it too. We had a lot of fun with this creative and simple project!
The Evidence:
I don't have pictures of the kids working on theirs or of their snow flakes, but here is the process I went through when I made mine.


The Verdict:
This project was fun and easy and the kids enjoyed it much more than cutting holes in folded up paper. There are all kinds of ways to construct these huge snowflakes, so if you are going to do it, I encourage you to have fun and be creative. You might also want to lay your popcicle sticks out in a way that makes you happy before ever gluing anything. Have fun with this!
The New:
Popcicle sticks are always a fun thing to craft with, but I had never before thought of making snowflakes with them until I saw a picture on Pinterest. So rather than just doing it myself, I decided to let the kids that I work with have their hand at it too. We had a lot of fun with this creative and simple project!
The Evidence:
I don't have pictures of the kids working on theirs or of their snow flakes, but here is the process I went through when I made mine.
The Verdict:
This project was fun and easy and the kids enjoyed it much more than cutting holes in folded up paper. There are all kinds of ways to construct these huge snowflakes, so if you are going to do it, I encourage you to have fun and be creative. You might also want to lay your popcicle sticks out in a way that makes you happy before ever gluing anything. Have fun with this!
Friday, December 19, 2014
Week 44: New Cobbler Recipe
Slowly but surely, I am catching up on these new things in blog form. Here's yet another yummy dessert that I made, a couple of weeks ago.
The New:
I have a boyfriend who loves himself some berries, so I decided to find a recipe for berry cobbler and whip it up. I came across several, but any crockpot recipe has instant dibs in my kitchen, so here's what I ended up making:
Triple Berry Crockpot Cobbler
Ingredients:
1 cup and 1/4 cup flour (separated)
1 cup and 3 Tbsp. sugar (separated)
1 tsp. baking powder
1/4 tsp. cinnamon
1 egg
1/4 cup milk
2 Tbsp. canola oil
1/8 tsp. salt
3 cups frozen berries ( I used a mix of raspberries, blueberries, and blackberries)
1/2 Tbsp. lemon juice
Directions:
1. Combine 1 cup flour, 3 Tbsp. sugar, baking powder, and cinnamon in a large bowl.
2. In a separate bowl, whisk together egg, milk, and canola oil until well-blended. Add mixture to dry ingredients from first step, and mix together until just moistened. Spread over the bottom of crockpot.
3. Mix remaining flour (1/4 cup) and sugar (1 cup) together. Add in lemon juice and berries and toss berries in mixture, coating the berries evenly. Spread the berries over batter in crockpot.
4. Cook on low for 2 to 2.5 hours, or until batter is cooked through. Serve with ice cream if desired.
The Evidence:


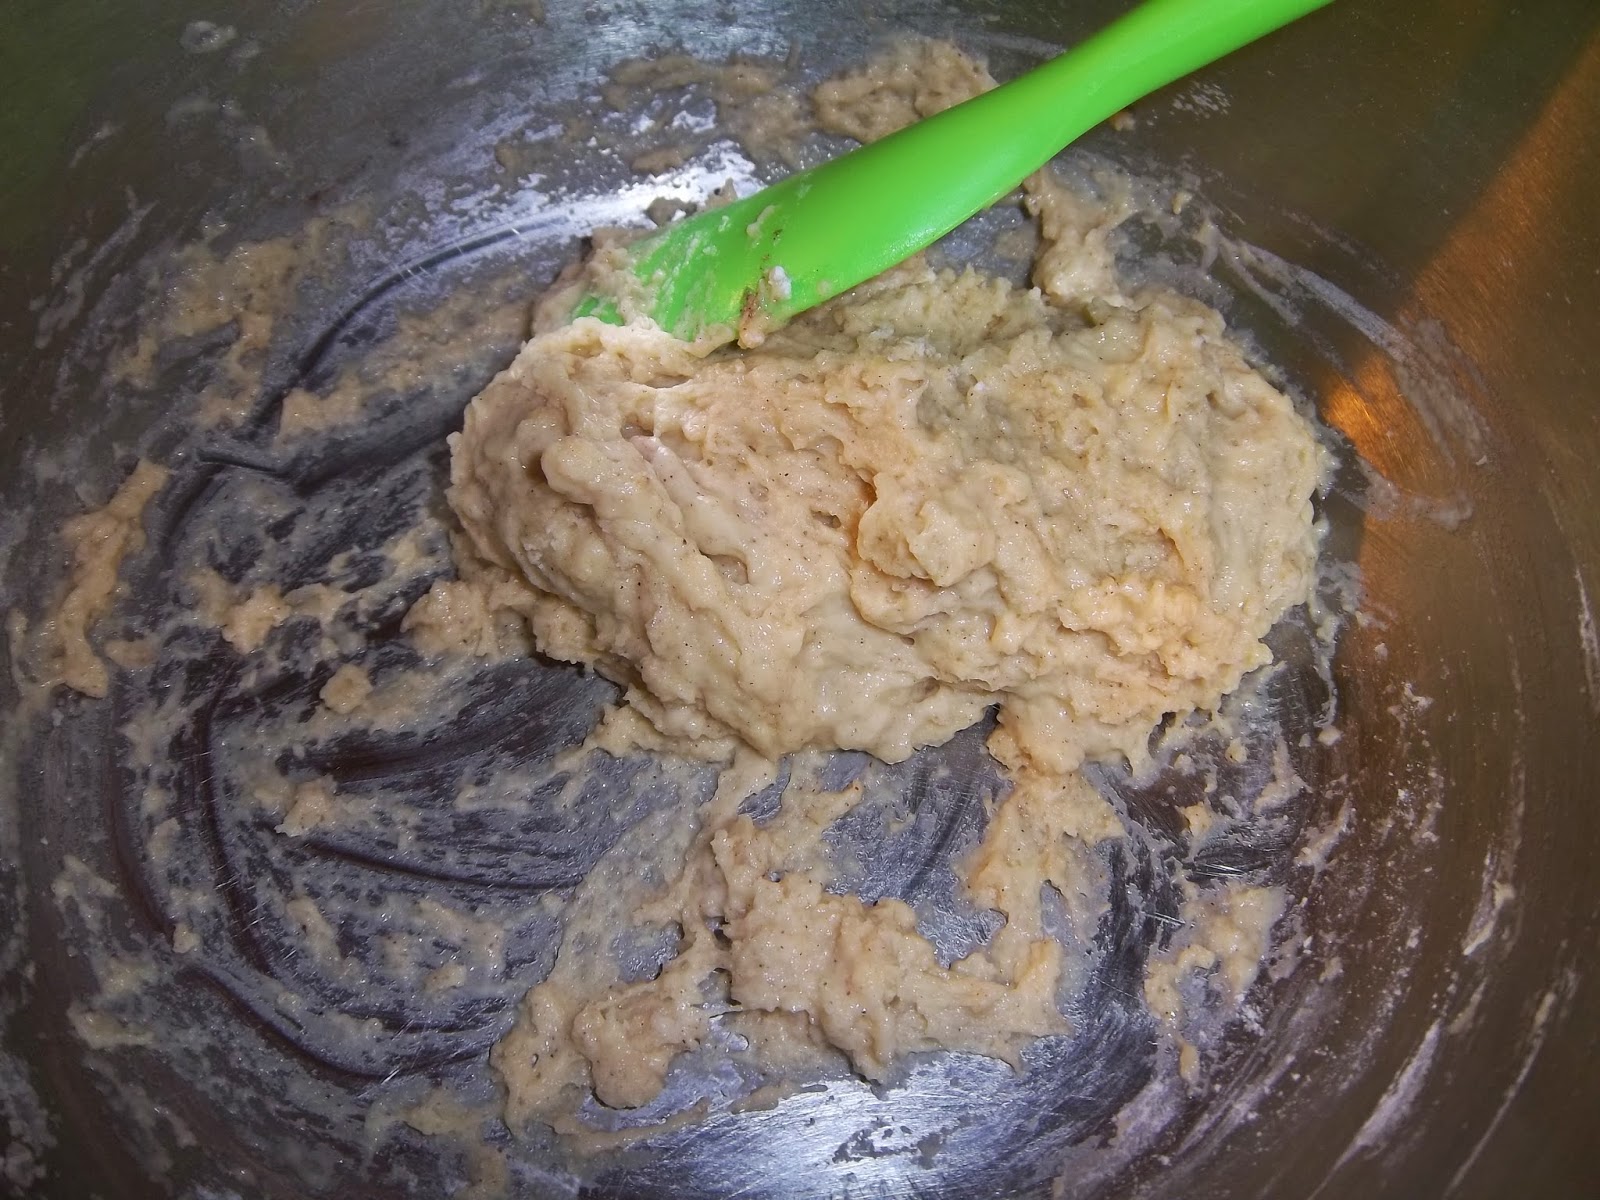
The berries that I used had been frozen, defrosted, and frozen again, so they were a little extra juicy, but seemed to work out just fine.


The Verdict:
This cobbler is definitely one that I will be making again, but next time with more breading or fewer berries! Other than that though, it was delicious and flavorful, just as I had hoped.
The New:
I have a boyfriend who loves himself some berries, so I decided to find a recipe for berry cobbler and whip it up. I came across several, but any crockpot recipe has instant dibs in my kitchen, so here's what I ended up making:
Triple Berry Crockpot Cobbler
Ingredients:
1 cup and 1/4 cup flour (separated)
1 cup and 3 Tbsp. sugar (separated)
1 tsp. baking powder
1/4 tsp. cinnamon
1 egg
1/4 cup milk
2 Tbsp. canola oil
1/8 tsp. salt
3 cups frozen berries ( I used a mix of raspberries, blueberries, and blackberries)
1/2 Tbsp. lemon juice
Directions:
1. Combine 1 cup flour, 3 Tbsp. sugar, baking powder, and cinnamon in a large bowl.
2. In a separate bowl, whisk together egg, milk, and canola oil until well-blended. Add mixture to dry ingredients from first step, and mix together until just moistened. Spread over the bottom of crockpot.
3. Mix remaining flour (1/4 cup) and sugar (1 cup) together. Add in lemon juice and berries and toss berries in mixture, coating the berries evenly. Spread the berries over batter in crockpot.
4. Cook on low for 2 to 2.5 hours, or until batter is cooked through. Serve with ice cream if desired.
The Evidence:
The berries that I used had been frozen, defrosted, and frozen again, so they were a little extra juicy, but seemed to work out just fine.
The Verdict:
This cobbler is definitely one that I will be making again, but next time with more breading or fewer berries! Other than that though, it was delicious and flavorful, just as I had hoped.
Subscribe to:
Posts (Atom)