Tuesday, April 29, 2014

Week 17: New Pest Removal

So this may not be as exciting to all those who have never dealt with the nusense of having a tiny and consistent trail of ants in your house, but for me, this was a miracle! Let me tell you more:


The New:
As I mentioned above, I was recently invaded with tiny ants. Gross. I needed a way to get rid of them, but I didn't feel like buying ant killer that was expensive and chalk full of chemicals. So after a little research, I stumbled upon a pretty simple way to take care of the problem here.

I heated 1/4 cup of water in the mircowave, added 1/2 cup sugar and 1/2 tablespoon borax to it, stirred it all up, and placed it in a shallow lid for the ants to feast upon.


The Evidence:


I stored the extra in an old gravy jar, just in case those little pests feel like coming back.


This picture and the next were taken about an hour and a half after I first set the concoction out. I used the toothpick to smear some of the syrupy liquid on the side of the plastic lid so the ants would find it faster.


These next two pictures were from six hours after first putting it out. You'll notice that all the ants are gone from the outer edge, and upon closer inspection, so was the syrup. This had to mean that they had eaten it and/or taken it back to their colony.
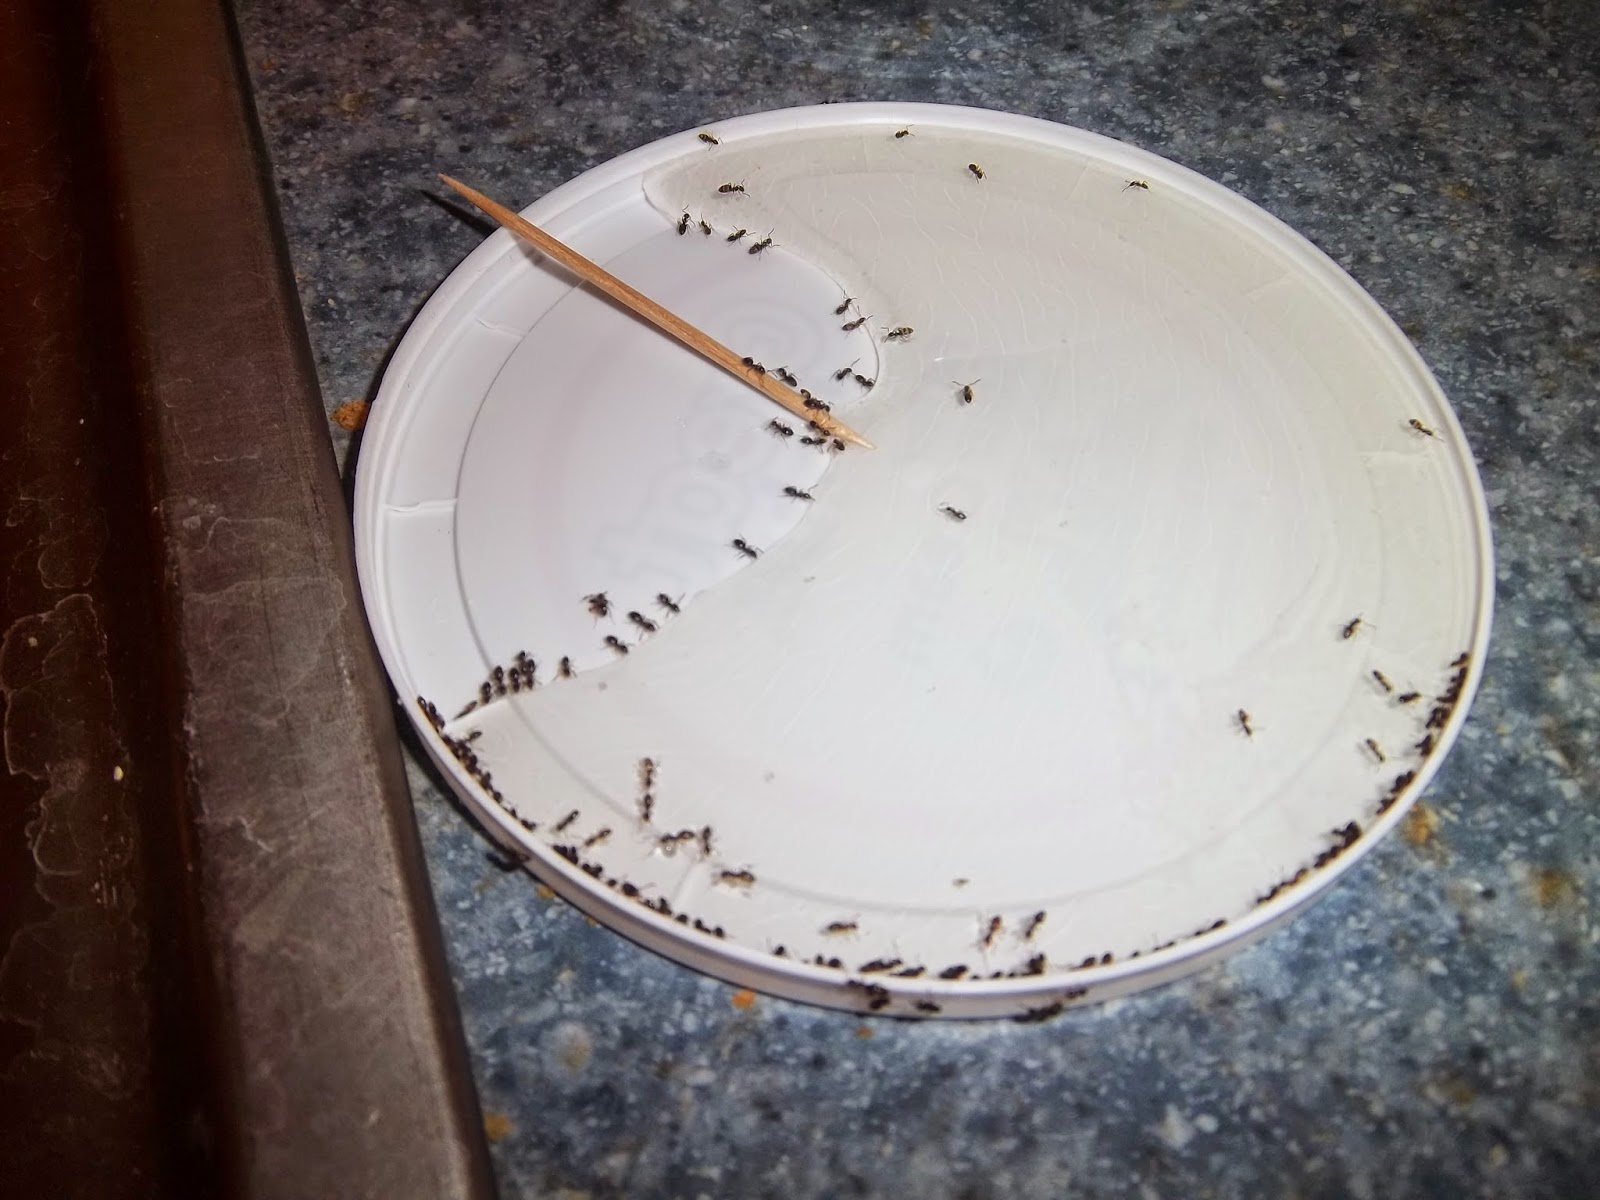

It's important to realize that this method will draw more ants in at first, but just wait....


The Verdict:
This method worked wonders for my ant problem. I first set the solution out at noon yesterday and by six o'clock tonight, there were just a few stray ants wandering around. There are about a dozen ants in the syrup, but they are all dead, so I guess that if I needed proof, it was laying right there for me to see.

If I ever ever ever have another ant problem, this will be my go-to fix, without question. Just one quick warning though: borax is toxic if ingested so you have to keep it away from kids and pets. It's worth it though, because those ants are DEAD!


Wednesday, April 23, 2014

Week 16: New Potato Recipe(s)

First off, I know this week 17 and I slacked off last week. So here is week 16 and I will post more newness later this week. Also, summer break is coming up and I can guarantee that I will be bringing you lots of fun and exciting and, of course, new things to be trying out! I already have a list of things for each week of summer, so stay tuned :)


The New:
I have a tendency to buy way more potatoes than I need for a certain recipe, but being the potato lover that I am, I always find a way to prepare the extras. That is exactly what happened for this week's new post. In fact, I got a little extra creative and came up with 2 different ways :)


Cubed Parsley Potatoes:
For this recipe, you will need potatoes, parsley, salt, and a little bit of oil. This is super simple, so don't be alarmed at the lack of description each step. First, cube the potatoes and spread them out on a baking sheet. Next drizzle/brush/spray/coat the potatoes with oil and sprinkle salt and parsley on them. Stick them in the oven for 15-20 minutes at 350 degrees. Cooking them longer will make the outsides more crispy.


Garlic Salted Fries:
Although this sounds more fattening because of the fries part, its really not. For this recipe, you need potatoes, oil, and you guessed it: garlic salt. Slice potatoes length-wise several times to create french-fry looking strips. Place them on a baking sheet and drizzle/brush/spray/coat them in oil. Sprinkle them with garlic salt and stick them in the oven for 15-20 minutes at 350 degrees. Cooking them longer will make the outsides more crispy.


The Evidence:


I had six potatoes, so I used 3 for each recipe.


The Verdict:
As I have said before, I love potatoes, so I was by no means disappointed in either of these recipes! They were delicious and ridiculously simple. I don't have much to say past that. I'm assuming it's pretty obvious that you could probably toss the cubed potatoes into another recipe more easily than the fries.
One side note though: these potatoes stuck to the foil on my pan pretty fiercely, so to avoid frustration you may want to grease the foil beforehand.

Enjoy :)


Sunday, April 13, 2014

Week 15: New Dessert

That's right, I'm breaking out the sweet stuff! You might be shocked to find how simple and how refreshing this dessert is, and without crazy amounts of sugar and fat! Check it out :)


The New:
This week, I had three bananas that were on the brink of going bad. You know that point where they're soft and not exactly palatable anymore, but they aren't quite banana-bread ready? Well, that's where these were at, so I decided to blend them up with about 2 Tbs. of peanut butter and stick the mixture in the freezer.

I checked on it about three hours later and it wasn't nearly as frozen as I was hoping, but I was dying to try it anyway, so I put a spoonful between two graham crackers and took bite. Yummmmmy!

The Evidence:


The Verdict:
This little treat was scrumptious! I might add more peanut butter, if I had to make any changes, but they were fantastic just like I them too. I am already looking forward to eating these little modified "ice cream" sandwiches all summer long, and my thighs are thankful that they won't have to find extra room to put them.

To spruce it up a little, I might add cinnamon to the mixture. Even mixing in vanilla pudding (or other flavors for that matter!) would give it some more flavor. However, I am a pretty big fan of bananas, so I wouldn't want to overwhelm this little beauty with too much extra excitement. I suppose that I could always change what I'm eating it on or with.

Opening that door, along with adding other flavors, could lead to some dangerous yet delicious combinations. Just think of how tasty this could be on vanilla wafers or mixed in to your oatmeal in the morning (unfrozen of course)! I'm not sure what took me so long to discover this simple and satisfying treat, but I won't be forgetting about it any time soon :)

Saturday, April 5, 2014

Week 14: New Movie

The New:
This week, I found enough time in my crazy schedule to watch Frozen, the newest animated movie that seems to be all the rage in the younger crowd. Seeing as it was targeting the youngsters, I know that it would be less than two hours long, so I gave in and let myself take a break from the craziness.


The Evidence:
Yet another week that I have no photo evidence for y'all, but for this sort of "new," it seemed a little unnecessary.

The Verdict:
I thought this movie was fantastic. It was such a relief to watch a movie where the girls don't rely on man to save them or to make everything right.When Anna chose to run over and protect her sister instead of getting her "true love's kiss" and saving herself, I was beside myself with excitement. Seriously though, isn't sacrificing yourself for someone else the ultimate act of true love? Two thumbs up for this movie, without a doubt!
If you haven't seen it, I would highly recommend it. There is a pretty good amount of adult humor in it, so even if you don't have kids, it is worth the 90 minutes out of your day to sit down and watch it.

Tuesday, April 1, 2014

Week 12 & 13: New Booze and Nail Design

Things with school have been crazy lately, and I'll admit, I have been neglectful these last two weeks. However, to make up for it I'm doing a 'double-feature' this morning! Check it out :)


The New:
This weekend I discovered a new mixed drink and the joy of using stamps on my nails. Let me tell you about these one at a time.


Fruity Blue Drink:

  • 2 oz. vodka
  • 1 oz. coconut rum
  • 1 oz. blue kinky
  • 1 oz. sour mix
  • 2 oz. pineapple juice
  • top it off with sprite
I found a similar drink on Pinterest (shocking, I know) and tweaked it some.


Nail Stamping:
A few years ago, I got a nail-stamping kit for Christmas and I was so excited to use it! But my Christmas break went by way to fast and when I brought it back home, it found its way to the very back of a cabinet that I rarely open. So long story short, I never got the chance to use it. 
When I happened upon it this weekend though, I got excited all over again and used it for the first time. When you scroll down to look at the pictures, just keep that "first time" part in mind! It's harder than it looks!


The Evidence:


I suppose the stamp isn't terrible, but I won't dare show you what my non-dominant hand produced...


The Verdict:

Seeing as my 21st birthday was less than a month ago, I am definitely still enjoying concocting new things to try. This blue fruity drink (even though it's less blue and more teal) was pretty good and I will more than likely make it again.

This whole nail-stamping endeavor is definitely something I need to keep practicing and working with! I have nowhere near perfected the technique, but I did have a lot of fun trying to figure it out. It will surely provide a little variety in my future nail-painting.


Tuesday, March 18, 2014

Week 11: (More) New Food

In case you hadn't figured it out yet, I love food. I love making it, I love eating it, I love talking about it, I just love food. So it should come as no surprise that I am using food yet again, to fulfill my New Year's Resolution of doing something new each week. Seeing as yesterday was St. Patrick's Day, I figured it was only appropriate to do something with potatoes.


The New:
As I mentioned above, I found a new way of preparing potatoes that I am pretty much in love with now. It's super easy and takes about half the time to cook, so I'm all for that. Here's what I did:

Ingredients:
  • Potatoes (as many as you want, whatever size you want)
  • Oil (being the broke college student that I am, I used vegetable oil because I had it on hand, but you could definitely use something else)
  • Garlic Salt (or other seasonings, if you fancy)
Directions:
  1. Scrub the dirt off the potatoes and make small slices in them, being sure not to cut all the way through. You want them to be attached at the bottom still. (See pictures below)
  2. Brush oil on to potatoes, being sure to get some in the slices you made. Sprinkle garlic salt onto potatoes.
  3. Cook at 425 degrees for about 28 minutes if your potatoes are small or up to 40 minutes if you used larger potatoes.
Things to keep in mind:
Making thinner slices will make your potatoes more crispy.
Letting potatoes bake for longer will also make them more crispy.
If you line your baking sheet with foil, cleaning up from this endeavor basically doesn't exist :)


The Evidence:


These 4 potatoes are just about to go into the oven...


And this is the deliciousness that came out 28 minutes later :)


The Verdict:
I will definitely be preparing my potatoes like this again in the future, and probably get a little more creative with the spices. I played it safe this time and just used something I knew I would love, but after making the potatoes this way, I get the feeling it might be hard to put something on these bad boys that would ruin them. Maybe next time I'll do something with rosemary...

Anyway, my point here is that this was so quick, easy, cheap, and delicious that I would definitely recommend giving it a shot if you're looking for a new way to serve potatoes (or even if you aren't :) )


I hope you all had a wonderful and safe St. Patty's Day!

Monday, March 10, 2014

Week 10: New Level of Organized

I apologize for such a late post on this tenth week of 2014! Things have been getting a little crazy with mid-terms and papers coming up, but I'm take a few minutes to stick to this New Year's Resolution of mine :)

The New:
Okay, so since I started Financial Peace University in February, I have been much better at not spending money willy-nilly. To get even more on top of it, I decided to plan out every meal for the month, and then stick to it! I know this may sound a little overboard, but it has solved my problem of trying to figure out what's for dinner 20 minutes before I get so hungry I feel like I could pass out.
Plus, it saves a ton of time when I'm making my grocery list every week because I have all the food right there, so it's much easier to know what I need for the upcoming week.

So here are my basic strategies:

  • Make lots and have leftovers for lunch. Whether its chili, enchiladas, spaghetti, soup, stir-fry, whatever, it's delicious and super easy to heat up the next day for lunch.
  • Meat every 3 days. This was something I started about a year ago because I watched a documentary that compelled me to do so for my health. As a result, I lost about 5 pounds and have kept it off. In addition to that though, it saves me a chunk of money every week. Meat costs much more than other proteins such as beans or whole wheat pasta.
  • Highlight the extra meals and use them next month. Sometimes, leftovers last longer than expected or you opt for a PB+J because you just don't feel like cooking. If you highlight the meals you skipped out on, it makes it much easier to see them and implement them into next month's planning.
  • Don't skip even one meal, unless you will be out of town (as I will be next week). Even if it seems silly to plan out breakfast for every morning, you might be surprised to find that it will save you time from trying to decide.
  • Eat healthy about 80% of the time. This is much easier to do if you break it down to 21 meals a week, and plan to eat healthy for 17 of them. 


The Evidence:

Here are my calendars, as proof :) the different colored high-lighters are just for aesthetic purposes, and nothing more. Also, you may be able to see that I abbreviated leftovers as LO. 


The Verdict:
As if I were not raving about it enough at the beginning, this small addition of some organization has been extremely helpful in keeping me on track in my budget and in eating relatively healthy. Sure, it does take some extra time at the end of each month, but I think in the long run it is definitely worth it. 
Also, it is relatively simple to get started. All I do is pull up a blank calendar from Microsoft word, fill in the days, and record a breakfast, lunch, and dinner for each day. Super simple!

Are you already doing something similar? Tell me about it in the comments!